Best Backpacking Tent: A Plain-English Guide
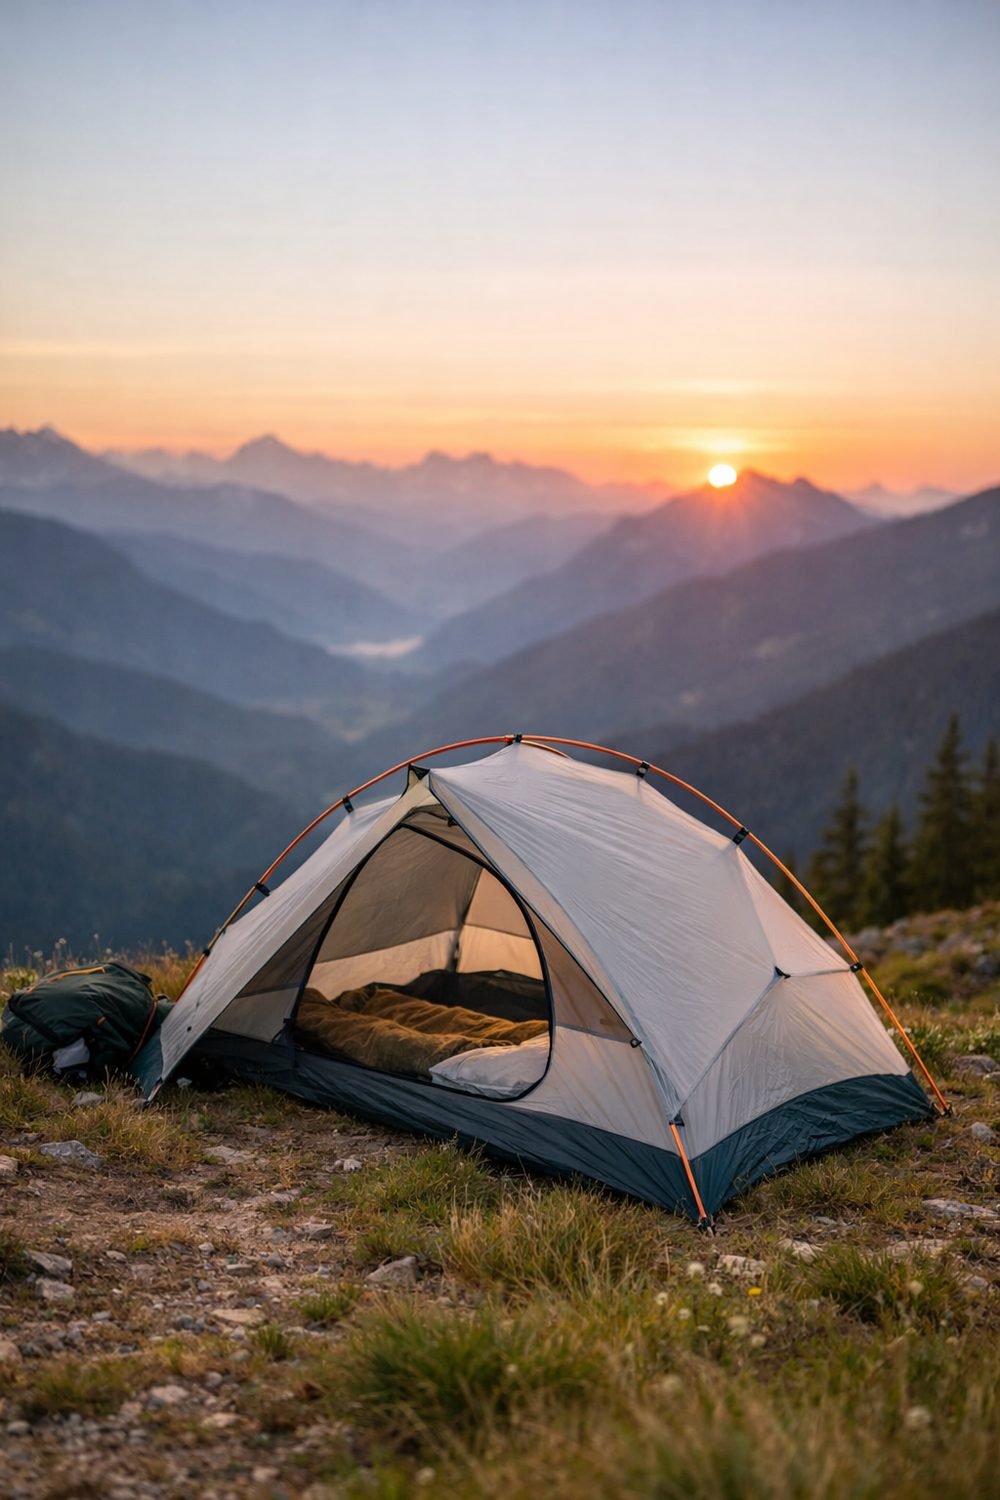
Finding the best backpacking tent is a balance of three things: weight, space and weather protection. You can't max out all three. Lighter tents usually give you less room or less storm protection. Roomier tents weigh more. The trick is figuring out which trade-offs you can live with.
Many people learn this the slow way. A first tent is often cheap, heavy and roomy. It can feel great in the backyard and become a burden by mile four. A second tent that is very light can feel like a win until a windy night on a ridge leaves you holding a pole up with your foot at 2 a.m. These days I think more about where I'm actually going, not where I dream of going.
This guide walks through what matters, what doesn't, and the mistakes I see people make again and again. No brand pushing here. Just the stuff that helps you pick a tent you'll still like after a few trips.
Short on time? Our top picks: Big Agnes Copper Spur HV UL, REI Co-op Half Dome, MSR Hubba Hubba and Nemo Hornet. See all picks
Quick summary
- Capacity: Tent ratings are tight. A "2-person" tent fits two people snugly with little room for gear.
- Weight: Look at the minimum trail weight and the packed weight, and know the difference.
- Season rating: Most people need a three-season tent. Four-season tents are for snow and serious wind.
- Setup: Freestanding tents, like the MSR Hubba Hubba, are easier to pitch. Trekking pole tents, such as the Zpacks Duplex, save weight but take practice.
- Ventilation: Good airflow cuts down on condensation, the wet walls you wake up to.
- Packed size: Make sure it fits in your pack, and think about splitting it with a partner.
- Practice: Set it up at home before your first trip. Seriously.
Start with where and how you'll camp before picking the best backpacking tent
Before you look at a single spec, picture your typical trip. Not the dream trip. The one you'll actually do most.
Are you doing one or two nights in summer at a lake an hour from the car? Or longer trips where every ounce feels heavy by day three? Will you camp in forests with shelter from the wind, or above treeline where gusts hit from every direction?
Weekend trips vs. long trips
For short trips, a slightly heavier tent is fine. You'll carry it for a few hours, and the extra comfort at camp is worth it. On longer hikes, weight starts to matter more because you're also carrying more food.
Solo vs. with a partner
If you hike with someone, you can split the tent. One person carries the body, the other carries the fly and poles. That makes a heavier, roomier two-person tent much easier to live with.
If you like keeping track of trips and gear, the Workout and Hiking Planner and Checklist Bundle below this post has checklists I'd have loved when I started. It's just a nice way to stop forgetting tent stakes. Ask me how I know.
Capacity: how many people really fit
Here's the thing nobody tells you clearly enough. Tent capacity ratings assume people lie side by side on standard sleeping pads with almost nothing else inside. A two-person tent is snug. Two adults who aren't close friends might find it a bit much.
Sizing up (or not) with large camping tents
A common rule people follow is "go one size up." So a solo hiker picks a two-person tent, and a couple picks a three-person tent. It's not a bad rule. You get room for gear, a dog, or just the ability to roll over without elbowing someone.
The cost is weight and a bigger footprint, and big tents for camping can be a squeeze at small, rocky campsites. If you're tall, or you use a wide pad, sizing up makes even more sense.
Floor shape and peak height
Two tents with the same floor area can feel totally different. Some taper at the feet to save weight. Some have walls that go nearly straight up, so you can sit without your head brushing the ceiling. Check the peak height and look at photos of people sitting inside if you can find them.
A slightly smaller tent with steeper walls is often a better choice than a bigger one that slopes in fast. Sitting up to change clothes is a small joy you'll appreciate on rainy days.
Doors and vestibules
In a two-person tent, two doors is a big deal. Nobody has to crawl over anyone to pee at night. Vestibules, the covered area outside the door under the rainfly, give you a spot for boots and packs so they stay dry but don't take up your sleeping space.
Weight: choosing a lightweight backpacking tent and reading the numbers right
Check the packed weight listed. Then check what's actually counted in it. Tent makers often list two or more weights, and they aren't the same thing.
Minimum trail weight vs. packed weight
Minimum trail weight usually means only the bare parts: tent body, rainfly and poles. No stakes, no stuff sacks, no guylines.
Packed weight usually includes everything that comes in the box. That's closer to what you'll carry, though some people leave a few bits at home.
Definitions can vary a little between brands, so read the seller's page to see what each number includes. Comparing one tent's minimum weight to another's packed weight is how people end up surprised.
How light is light enough?
Ultralight tents are tempting. They're also often pricier, made with thinner fabrics, and sometimes fussier to pitch. If you're new, I wouldn't chase the lightest number. A middle-weight tent that's easy to set up and tough enough for some rough ground is a smarter first pick for most people.
Where I'd save weight instead: your sleeping bag, your cook kit, your pack (a good pick from the best backpacking backpacks makes a difference) and all the "just in case" stuff you never touch. A lot of people carry a heavy pack because of small extras, not the tent.
Season rating: three-season or four
This one is simpler than it sounds.
Three-season tents
Built for spring, summer and fall. They handle rain and moderate wind, and they usually have lots of mesh for airflow. For most backpackers, this is the right choice.
Four-season tents
Built for snow, cold and strong wind, so they work as a winter camping tent. They have sturdier poles, less mesh and steeper walls so snow slides off. They're heavier and can feel stuffy in warm weather. Unless you're camping in winter conditions or exposed mountain terrain, you probably don't need one.
The "three-season plus" middle ground
Some tents sit in between, with a bit more fabric and stronger structure than a typical summer tent. These can work for shoulder seasons when early snow is possible. If that's you, compare how much mesh each tent body has and whether the fly goes close to the ground.
Setup: freestanding, semi-freestanding and trekking pole tents
The way a tent stands up affects how fast you can pitch it, where you can pitch it, and how much it weighs.
Freestanding
The poles hold the tent up without stakes. You can pick it up and move it, shake out dirt, and pitch it on rock or wooden platforms. You'll still want to stake it so it doesn't blow away. These are the easiest for beginners.
Semi-freestanding
Mostly holds its shape with poles, but needs a stake or two at the ends to fully stretch out. Lighter than fully freestanding tents in many cases. A good compromise.
Trekking pole tents
These use your hiking poles instead of tent poles. You save weight because you're already carrying the poles. The downside is they need good staking and a decent pitch to stay tight, and they can be tricky on hard ground or sand. They have their appeal, but they're not the best pick for a first-timer heading out in a storm.
Practice at home
Set up your tent in the yard, a park, or even your living room. Do it twice. Then try it fast, like rain is coming. The first time I pitched a new tent at camp, I put the fly on inside-out in fading light and felt very silly. A practice run would have saved me twenty grumpy minutes.
Practice also tells you if anything is missing from the box before you're miles from a store.
Ventilation and condensation
Ventilation helps with condensation, which surprises a lot of new campers. You wake up, touch the tent wall, and it's wet. It didn't leak. That's moisture from your breath and the cool night air collecting inside the fly.
What helps
- Vents near the top of the rainfly that can be propped open
- Mesh panels in the tent body
- A gap between the fly and the ground so air can move
- Pitching the tent so a breeze can pass through
Single-wall vs. double-wall
Double-wall tents have a mesh or fabric inner tent plus a separate rainfly. Condensation forms on the fly, and the inner wall keeps it off you. Single-wall tents use one layer, which saves weight, but you're more likely to brush damp walls.
For most people, I'd pick double-wall. Single-wall tents are fine in dry climates and for people who know their tricks, but they're a bit overrated as a beginner choice.
Campsite choice matters too
Camping right next to a lake or in a low, damp meadow invites condensation. Pitching under trees or on slightly higher ground often helps. No tent fully stops it, so pack a small cloth to wipe the walls in the morning.
Packed size and how you carry it
Your tent has to fit your pack, so think about both together. Sounds obvious. Still trips people up.
Check the packed dimensions
Look at the packed size on the seller's page. Long poles can be awkward. Some people carry poles on the outside of the pack and the tent body inside.
Ditch the stuff sack (maybe)
A useful trick is to stuff the tent body and fly loose into the bottom of your pack, where they fill gaps around other gear. Poles and stakes go in their own small bag so they don't poke holes in anything. Try it and see if you like it.
By the way, if you're getting in shape for trail season, you can grab the free 1-Week Beginner Workout Routine Planner Page by joining the email list.
Materials, floors and durability
You'll see fabric thickness listed in "denier," shown as a number followed by D. Higher numbers usually mean thicker, tougher fabric. Lower numbers usually mean lighter but more delicate.
The floor takes the most abuse
Floors rub on rocks, sticks and grit. A thin floor can wear faster. That's where a footprint, a ground sheet under the tent, comes in.
Do you need a footprint?
Honestly, it depends. A footprint adds weight but protects your floor. Some people cut a cheap ground sheet to size instead of buying the matching one. If your tent floor is on the thin side, or you camp on rough ground, I think it's worth it. If you camp mostly on soft forest dirt, you might skip it.
Poles and zippers
Look at what the poles are made of and how the zippers feel. Stuck zippers are one of the most annoying tent problems. If you can see a tent in person, open and close the doors a few times.
Comparing tents side by side
When you've got a short list, put the details next to each other. Here's an example of how I think through two made-up options:
Tent A: freestanding, two doors, heavier, roomy with steep walls. Tent B: trekking pole style, one door, much lighter, tighter inside.
For a couple doing summer weekends, I'd lean toward Tent A. Split the weight and enjoy the space. For a solo hiker doing longer, dry-weather trips who already uses trekking poles, Tent B makes more sense.
Same specs, different winners. That's why your trip plan matters more than any "best tent" list.
If you like comparing gear on paper, the comparison sheet style in the Home-Gym Equipment Buyer's Guide and Comparison Sheets below this post works the same way. It's built for home-gym gear, but the habit of writing specs side by side carries over.
Common mistakes
- Buying for the dream trip. A four-season tent for an imagined mountain climb, then using it on warm summer weekends. Buy for what you'll do most.
- Comparing the wrong weights. Minimum trail weight on one tent, packed weight on another. Match them up.
- Trusting the capacity number. Two-person means snug. Picture your actual sleeping pads and gear.
- Skipping the practice pitch. Setting up for the first time in the dark or rain is no fun.
- Sealing every vent when it's cold. Feels warmer, but you'll wake up to soaked walls.
- Packing it away wet and forgetting it. Dry your tent fully at home after a trip so it doesn't get musty or mildewed.
- Going ultralight too soon. Learn what you like first. You can always trim weight later.
Backpacking tents worth a look
These are well-known tents and makers that come up often with backpackers. Match each one to your own trips, not the other way around.
Big Agnes Copper Spur HV UL
A popular freestanding option for people who want a livable tent without going heavy. It suits hikers who value room to sit up and a couple of doors. Check the packed weight against the minimum trail weight before you compare it with other tents.
REI Co-op Half Dome
A friendly pick for beginners and weekend trips, where ease of setup matters more than shaving ounces. It suits couples who plan to split the load. Check the weight and packed size to be sure it fits comfortably in your pack.
MSR Hubba Hubba
A long-running freestanding tent that many backpackers consider for two-person trips. It suits people who want a balance of weight, space and weather protection. Check the floor shape and peak height to see if it feels roomy enough for you.
Nemo Hornet
A lighter-leaning tent that suits solo hikers or couples who accept a snug fit. It is a good fit if pack weight is a priority. Check how much interior space you get with your sleeping pad and gear.
Zpacks Duplex
A trekking pole tent that appeals to ultralight hikers who already carry poles. It suits people with some experience pitching tents. Check that your poles work with the setup and practice the pitch at home first.
Durston Gear X-Mid
Another trekking pole design that is well regarded among lightweight backpackers. It suits solo hikers or pairs who like a roomy layout for the weight. Check how it handles wind and what staking it needs on your usual ground.
Hilleberg Nallo
A sturdy tent from a brand known for strong shelters in rough weather. It suits hikers heading into exposed or colder places. Check the weight carefully, since tougher tents usually carry more of it.
Check current plans and prices on each brand's own site before you decide.
FAQ
Is a two-person tent big enough for two people?
It is, but it's snug. You'll fit side by side with not much room for gear inside. If you want space or one of you is tall, a three-person tent is worth a look.
Do I really need a four-season tent?
Most people don't. Three-season tents cover spring through fall in most places. Four-season tents are for snow, deep cold and strong mountain wind.
Why is my tent wet inside when it didn't rain?
That's condensation from your breath and cool air. Open the vents, keep some airflow, and avoid camping in damp, low spots. A small cloth to wipe the walls helps too.
How should I store my tent between trips?
Make sure it's completely dry first. Many people store it loosely in a large bag instead of tightly packed. Check the maker's care instructions on the seller's page for specifics.
Your next step is simple. Grab the free 1-Week Beginner Workout Routine Planner Page by joining the email list, so your legs are ready for those first miles. Then take a look at the planner bundle and comparison sheets below this post if they'd help you plan trips and compare gear. And whatever tent you pick, pitch it in the yard once before you go.
Printables and tools that can help
Home-Gym Equipment Buyer's Guide and Comparison Sheets
A printable guide and comparison sheets to write down what matters to you before you look at any seller...
See detailsWorkout and Hiking Planner and Checklist Bundle
A printable bundle with a 30-day goal page, weekly planner and checklists for beginners in fitness and...
See details